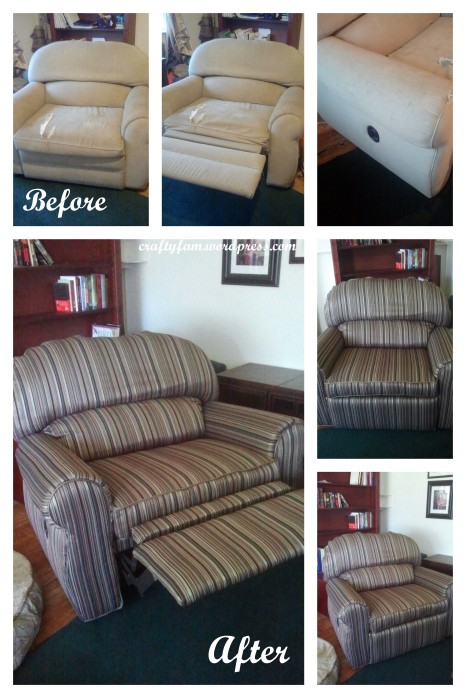
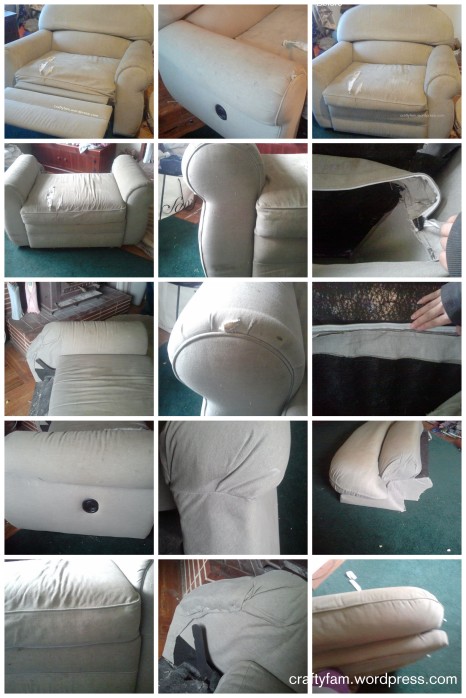
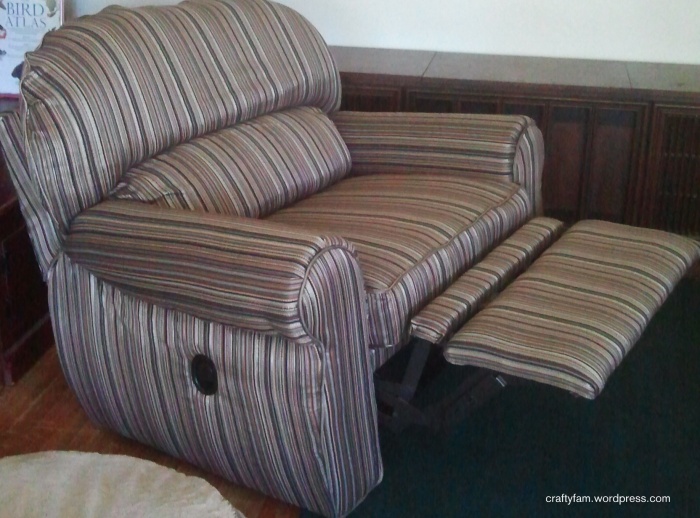
My dogs over the past year have slowly started to claim my over-sized recliner chair. There used to be a tiny hole on the cushion. My dog being the digger that he is would scratch at it all the time. At one point I even placed a couch cover on to prevent and so we won’t see the hole anymore since it was getting bigger. That didn’t help, he still kept going at the spot where the hole was that and making it bigger as you can see in the pictures. I wanted to reupholster it but because of the size I was dreading it.


This is the culprit.
A few months ago my local fabric store had a great sale. 40% off red tag (clearance) fabric. So I went down there searching for some fabric that would match my living room. I found this fabric for $15 a yard(used to be $23.99) plus an additional 40% off. I had to buy 7 yards because it was a stripe pattern (yeah I didn’t match it easy on myself at all, did I say this was my first major re-upholstery project?)
What I used:
- Flathead screwdriver
- Pliers
- Upholstery Tack Strip (Cardboard Tape)
- Metal Tack Strips (reused the ones on the recliner)
- Upholstery Pneumatic Stapler & small 3 gallon air compressor
- Piping (reused piping from the couch)
This project took about one week to complete it was stop and go. I have to say there was quite a few of times I wanted to throw this couch out instead to finishing it. And times when I just stopped working on it because I was getting frustrated or my hands we hurts from removing the millions of staples that were in this recliner. But I just kept thinking of the reward of saying “I did that and no one else will ever have one like mine!” Silly but it helped a lot.
Starter Photos:
This recliner is 2 pieces, the top backing and the bottom part. In order to take the top off you have to flip it upside down and there will be 2 levers. Release the two levers and then flip upright to pull off. To put back on just reverse the procedure.
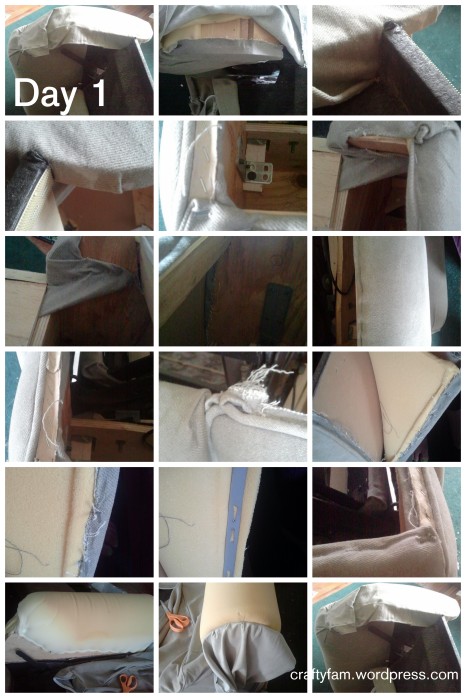
Day 1:
Pulling out staples on the bottom half of the recliner.
Tip: upholster in sections so your remember where everything still goes. Get a Sharpe and write descriptions on every single piece of fabric you take off including the piping. Ex: 2A, Right side arm chair, also draw lines and arrows to remember which way is up or front to back. Make sectioned piles of the fabric.
In my pictures you will see there is a recline lever. I pulled, I pushed, I yelled at this lever trying to detach it from the chair, but to no avail. I then called my husband over for his muscles to get it out and he points to 2 little screws holding it in place under the lever. All I could do is laugh. So look for the screws. Once they are removed the lever comes right out.
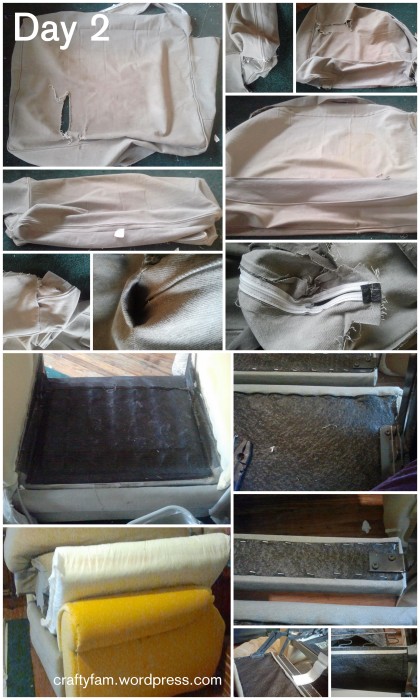
Day 2:
I seam ripped apart the seat cushion. Make sure to take lots of pictures from every angle before you do. Just when you think you’ve taken a good amount of pictures take some more. There we times I wish I had more pictures because this is your instructions for putting it back together.
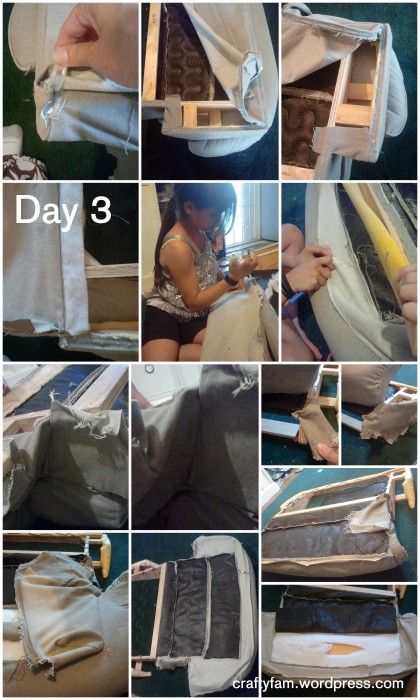
Day 3:
Pulling staples and and seam ripping some more. My daughter wanted to help me pull it apart, so of course I said yes, four hands are better than two. By now I have calluses on my hands because my pliers don’t have padding on them. I recommend to have padded pliers or do what I did and use quilt batting for cushion.
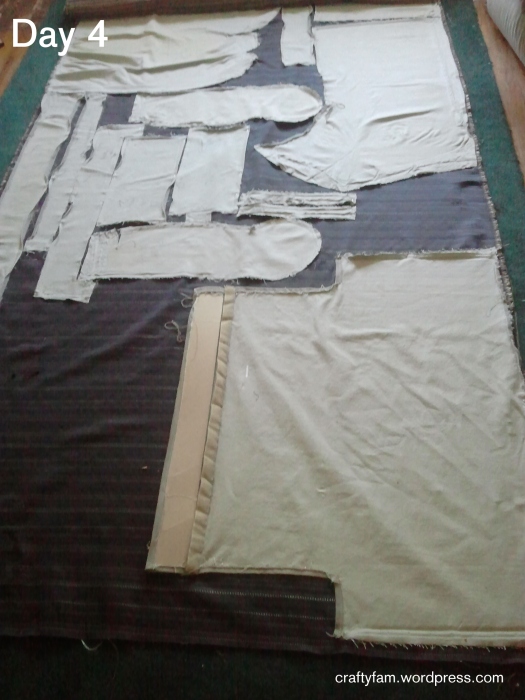
Day 4:
Laying out my pattern (the old recliner fabric that I took apart)
Day 5-7:
Sew, seam rip… sew some more…seam rip some more….sew, staple, put backing on. Make sure you pull tight when stapling it back on.


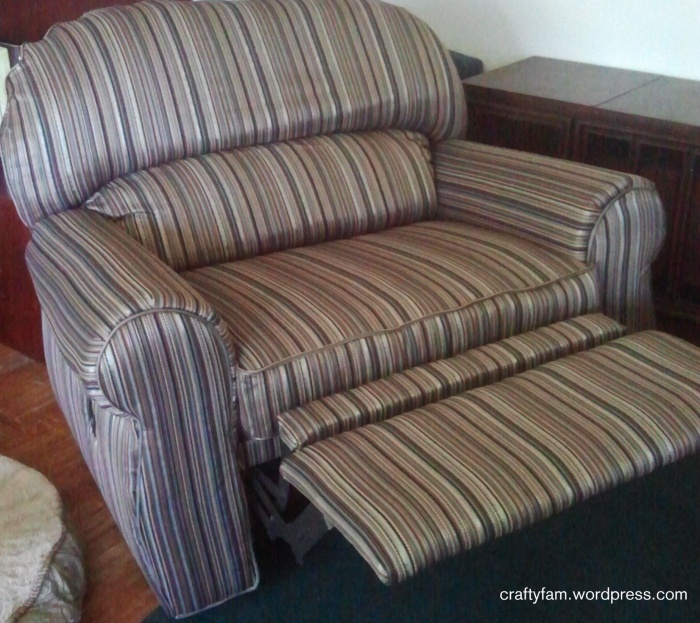
I can’t believe I did that. Love it!
I found this great re-upholstery chair tutorial by Make it & Love it. I got some tips from this blog to help me along the way.